
A customer wants to send you a screenshot of a checkout error. A job applicant needs to attach a resume. Or a client wants to share a project brief before requesting a quote. If your WordPress form only collects names, email addresses, and messages, visitors have to send these files separately through email. That creates extra steps for both sides and makes it harder to keep attachments with the right submissions.
A WordPress file upload form lets visitors attach documents, images, and other files directly to their submissions. You can collect everything in one place instead of chasing attachments through separate emails.
In this guide, we’ll show you how to create a file upload form in WordPress using Gutena Forms Pro, configure its upload settings, and start collecting files through your website.
What is a WordPress File Upload Form?
A WordPress file upload form is an online form that allows visitors to attach files when submitting their information. Along with standard fields such as name, email address, and message, it includes a file upload field where users can select documents or images from their devices.
Without a file upload option, visitors must send attachments separately through email or another channel. This creates extra work because you have to match each file with the correct form submission.
A WordPress form with file upload keeps the process together. Visitors provide their details and attach the required files in one submission.
Why Add a File Upload Form to Your WordPress Site?
A regular contact form works well when you only need text-based information. But some requests require supporting documents, images, or other files. Adding a file upload option makes it easier for visitors to provide everything you need.
Here are four reasons to add a file upload form to your WordPress site.
1. Collect Files Without Email Back-and-Forth
Without an upload field, visitors have to submit your form first and then send their attachments separately. You may need to follow up if they forget a file or send it to the wrong email address.
A WordPress file upload form removes this extra step.
2. Keep Files and Form Details Together
When visitors send files through separate emails, you have to identify which attachment belongs to which person or request. That becomes difficult when you receive several submissions.
A form with file upload connects the attachment to the information submitted with it.
3. Control What People Can Upload
You don’t need to accept every file type or allow visitors to upload files of any size.
A form builder with file upload settings lets you define which file types visitors can submit and set an upload size limit. These restrictions help you collect relevant files while reducing unnecessary uploads.
4. Get Notified When Someone Submits a File
Email notifications help you respond to new submissions without repeatedly checking your WordPress dashboard.
You can configure your form to notify the relevant email address when someone submits their details.
Common Uses for a WordPress Form With File Upload
A WordPress form with file upload is useful whenever visitors need to provide more than basic contact information. You can add an upload field to different types of forms, depending on what you collect.
Common examples include:
- Job applications: Let candidates upload resumes, cover letters, certificates, or portfolios.
- Customer support requests: Ask customers to attach screenshots, error logs, or images that explain their problems.
- Client onboarding: Collect contracts, project briefs, identification documents, or other paperwork from new clients.
- Quote requests: Allow customers to upload product photos, design references, or project specifications to help you prepare an accurate quote.
- Contest entries: Accept photographs, artwork, videos, or other submissions from participants.
You can also add an upload field to an existing contact form instead of creating a separate form for file collection.
4 Steps to Create a File Upload Form in WordPress
You can create a file upload form in WordPress without writing code. You need a form builder that works with the Gutenberg block editor and lets you create forms directly inside WordPress.
For this tutorial, we’ll use Gutena Forms Pro. Its file upload functionality lets visitors attach files to their form submissions.
Prerequisites: Install and Activate Gutena Forms Pro
Before creating your form, install and activate Gutena Forms and its Pro version on your WordPress website.
If you haven’t installed the plugins yet, follow these steps:
- Log in to your WordPress dashboard.
- Go to Plugins → Add Plugin.
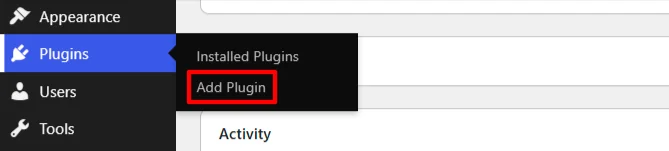
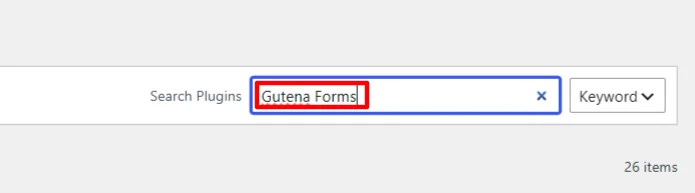
- Search for Gutena Forms and install the plugin.
- Click Activate once the installation finishes.
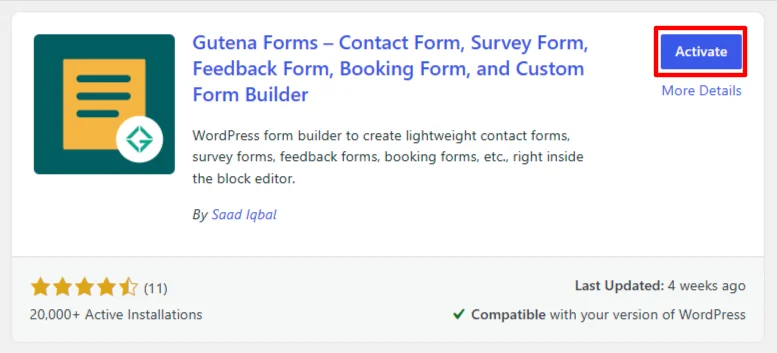
Now that you have installed and activated Gutena Forms, you need to get Gutena Forms Pro.
- Visit the Gutena Forms pricing page and purchase a plan.
- You’ll get an email with the Gutena Forms Pro ZIP file and license key. Download the ZIP file and copy the license key.
- Now go back to Plugins → Add Plugin → Upload Plugin.
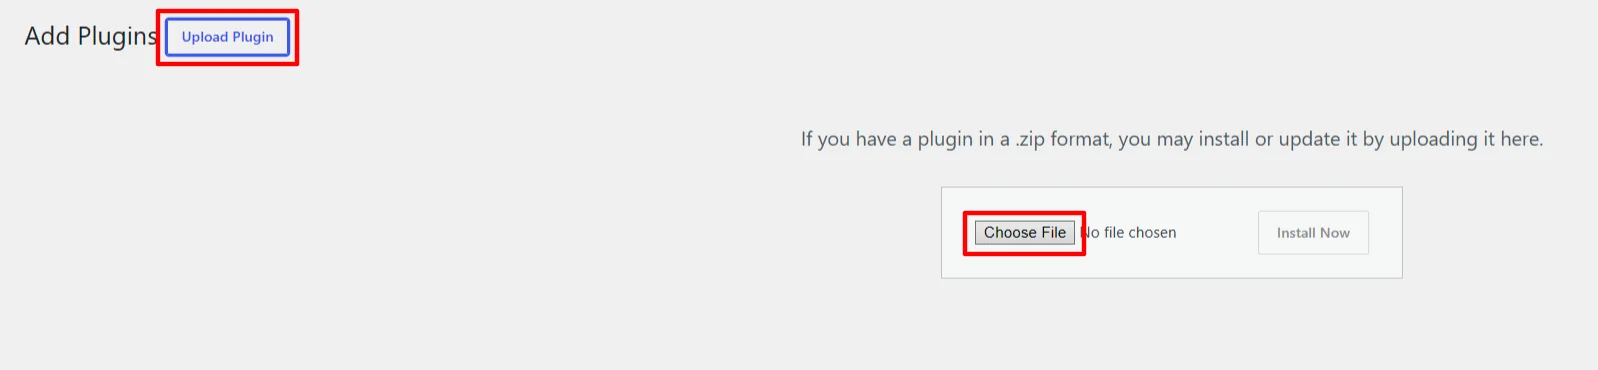
- Click on Choose File and select the Gutena Forms Pro ZIP file.
- Click Install Now.
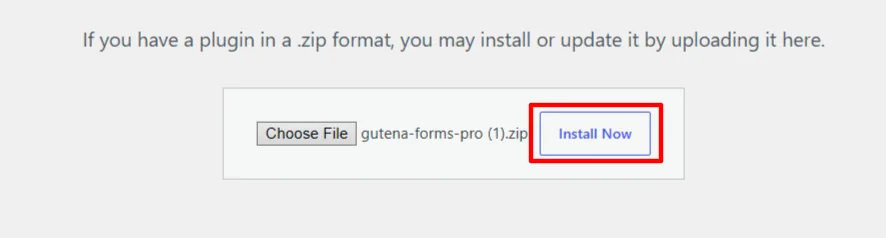
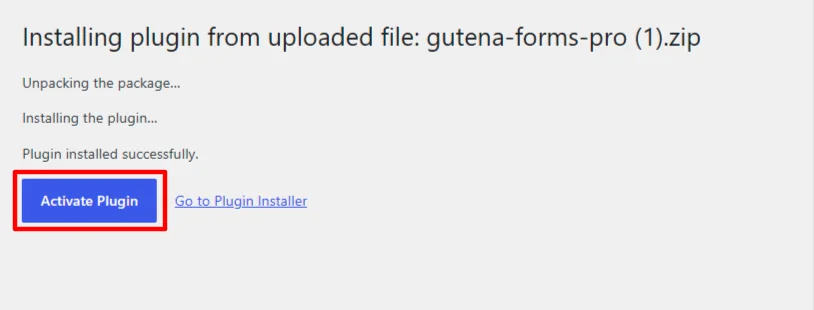
- Click on Activate Plugin. You will be redirected to the All Plugins page.
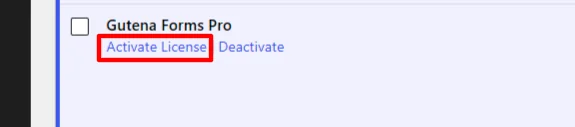
- Scroll down and click on Activate License.
- Paste the license key and click on Agree & Activate License.
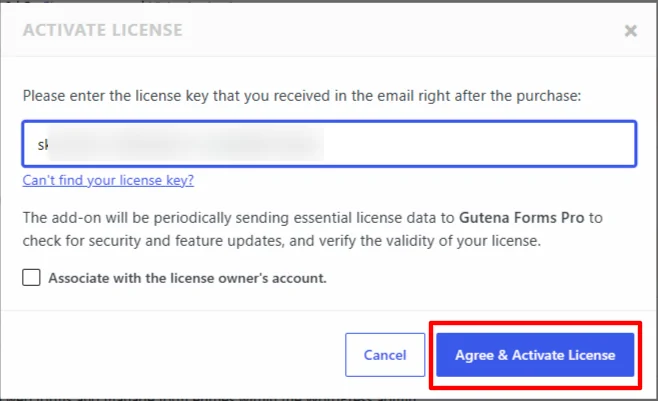
Congratulations! You have successfully installed Gutena Forms Pro!
Make sure both plugins are active before continuing, as the file upload field requires Gutena Forms Pro.
Step 1: Create a New Form in the Block Editor
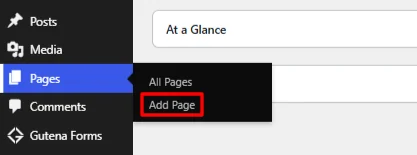
First, go to Pages → Add Page, and add a relevant title, for instance, a CV bank page.
In the WordPress block editor:
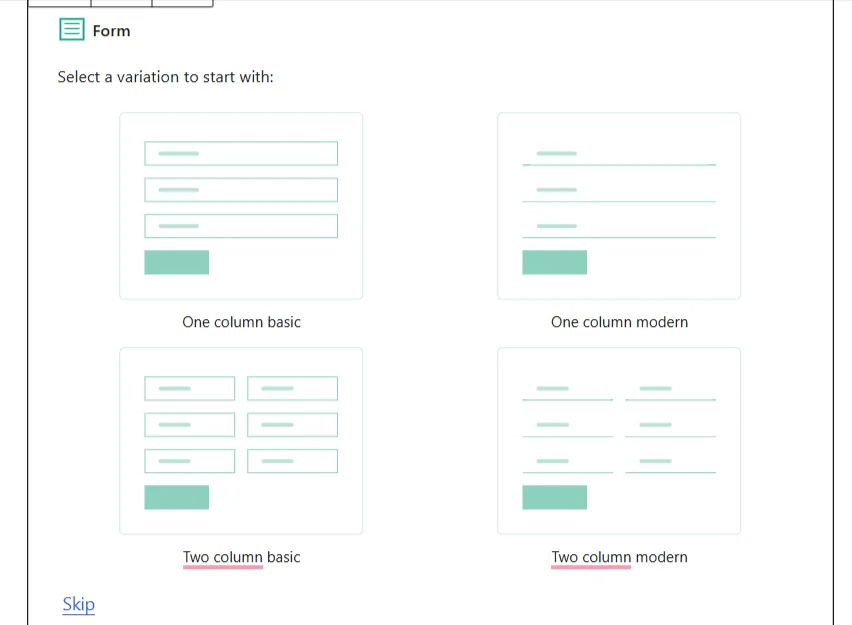
- Enter /Gutena Forms and select Form.

- You can now start building your form directly on the page saving you time. You also have an option to select an existing form.
- Select a form variation.
- Start with the basic fields your form needs. For example, a document submission form may include:
- Name
- Email address
- Phone Number
- File Upload
- Message
Keep the form focused. You can also add the file upload field in the next step by using multistep form capability as well.
Take a look at: How to Create a Multi-Step Form in WordPress (3 Easy Steps).
Step 2: Add the File Upload Field
Now add a file upload field so visitors can attach documents or images to their submissions.
- Click on the + button.

- Search for File Upload or scroll till you find Gutena Forms General Fields and drag and drop File Upload.
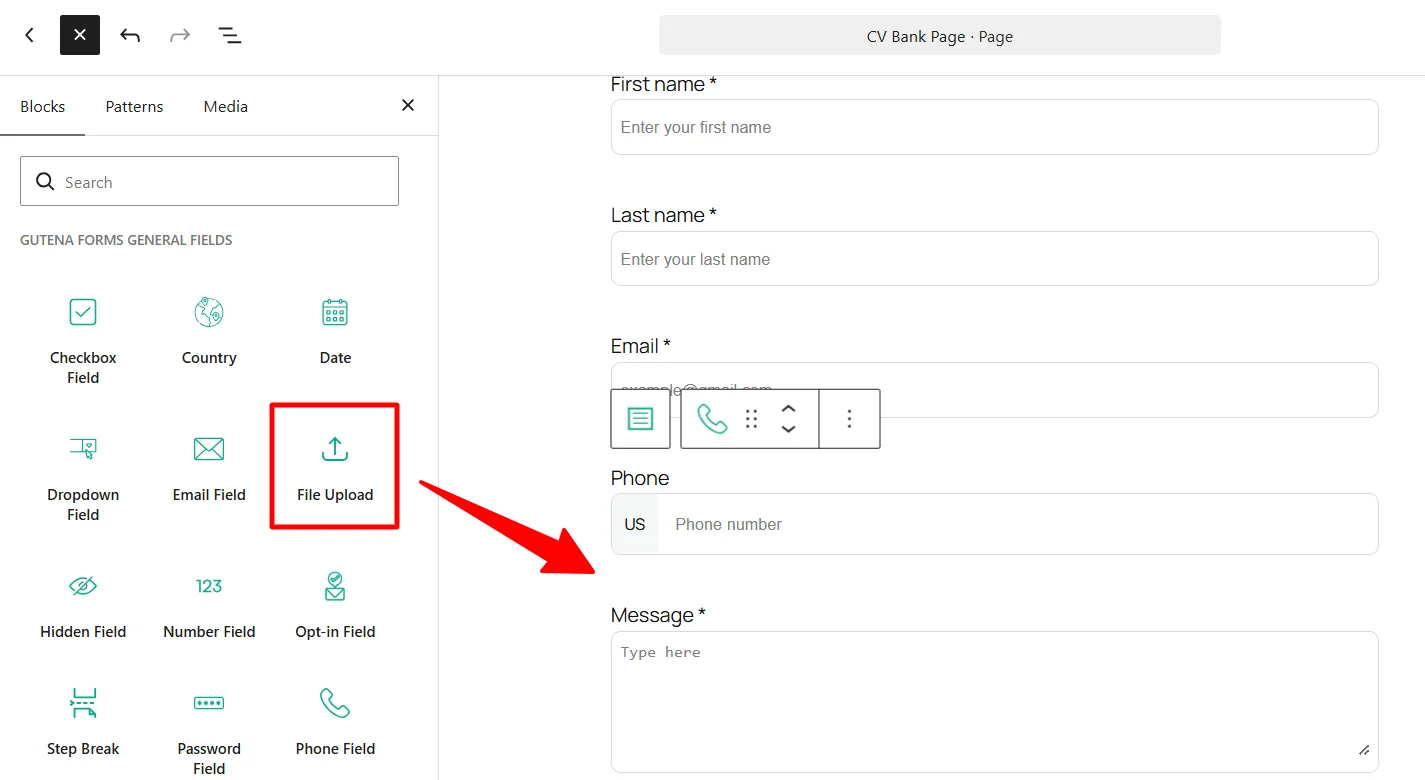
Once you add the field, give it a clear label. For example:
- Upload your resume
- Attach a screenshot
- Upload your project brief
- Add supporting documents
A specific label tells visitors what you expect them to submit. Avoid generic labels such as “Upload File” when the form requires a particular document.
Step 3: Configure the File Upload Field Settings
Adding the file upload field is only part of the setup. You should also configure its settings to control what visitors can upload and how they interact with the field.
Select the File Upload field in the editor to access its available settings.
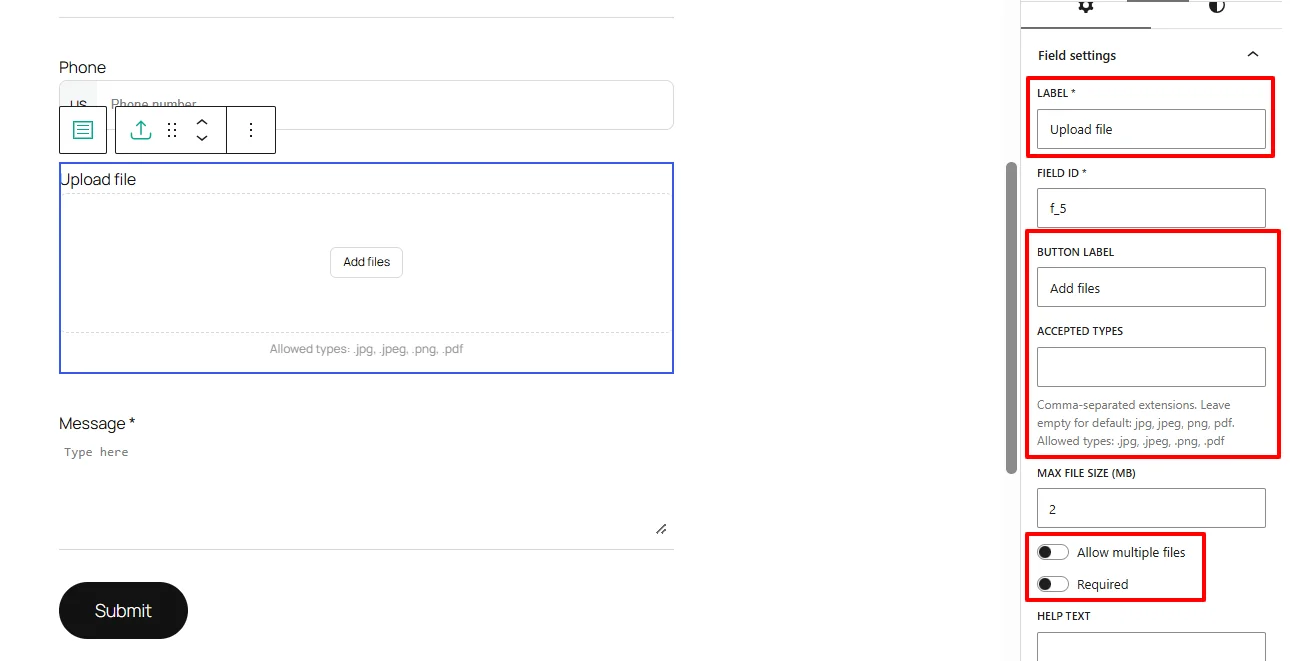
Configure the following options according to your form’s requirements.
- Customize the button label – Change the default “Add files” label to something more specific, such as “Upload CV and Personal Statement.”
- Set accepted file types – Specify the formats visitors can upload, such as .pdf, .jpg, or .png.
- Set the maximum file size – Specify the maximum allowed size for each uploaded file in MB.
- Allow multiple files – Enable this option if visitors need to upload more than one file.
- Make the field required – Enable this setting if visitors must attach a file before submitting the form.
Click on Publish.
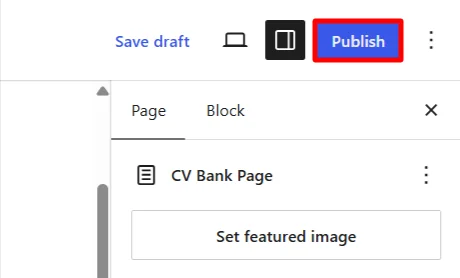
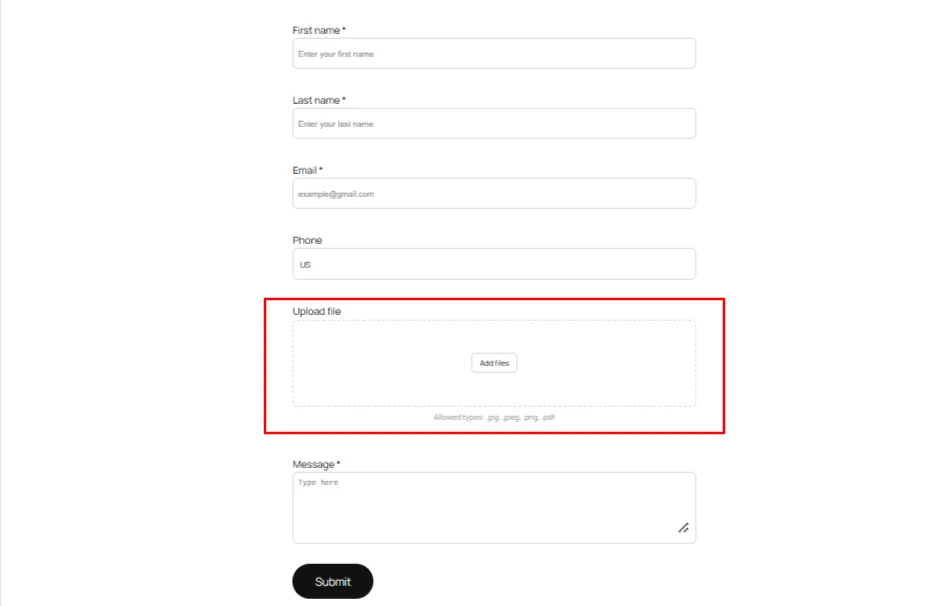
Now you have successfully created and published a WordPress File Upload Form.
Step 4: Set Up Email Notifications and Spam Protection
After publishing the form, select the form, and in the right-side panel, you will see Gutena Form settings.
Enable email notifications and click Configure to add the recipient email address. Use an inbox that the person responsible for reviewing submissions can access.
You can also customize the form confirmation message to inform visitors that their submission was successful.
Toggle each on and click Configure to add the recipient email address. Use an inbox that the person responsible for reviewing submissions can access.
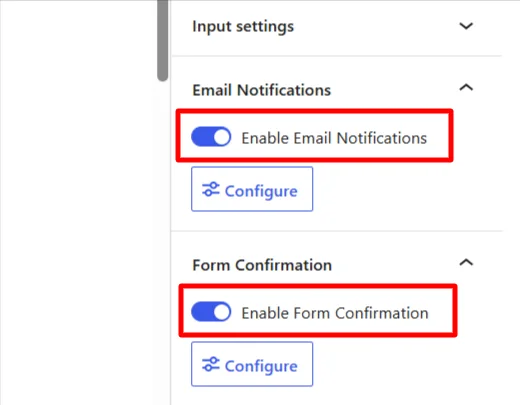
Include relevant submission details in the notification so you can identify the request. If the plugin provides an uploaded-file link or attachment option, configure it according to how you want to access submitted files.
For Spam Protection:
You should also enable spam protection. Public forms can attract automated submissions, and file upload fields may give spammers another way to send unwanted content.
- Go to Gutena Forms → Settings.
- Select any one of the currently available spam protection methods.
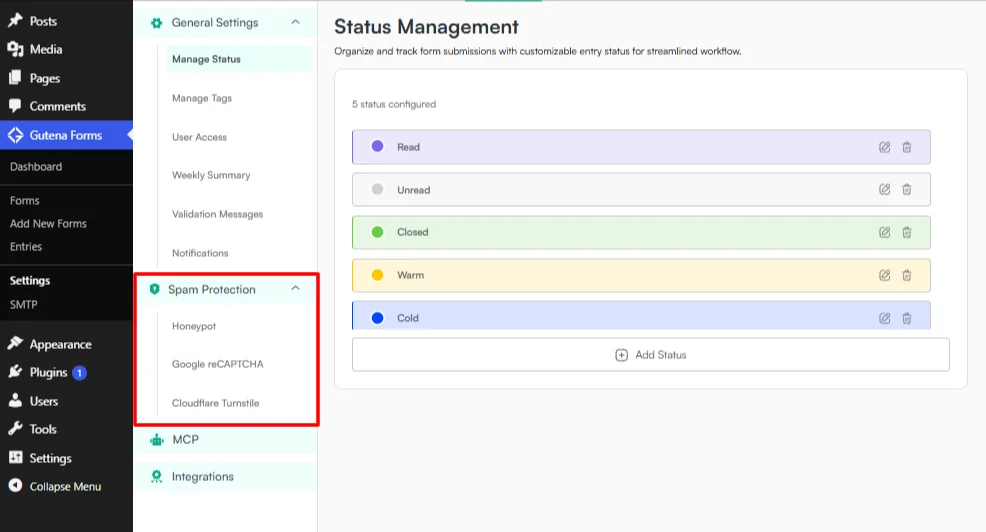
- Select Honeypot and enable Honeypot Security. For instructions on configuring other spam protection methods, refer to the relevant documentation below.
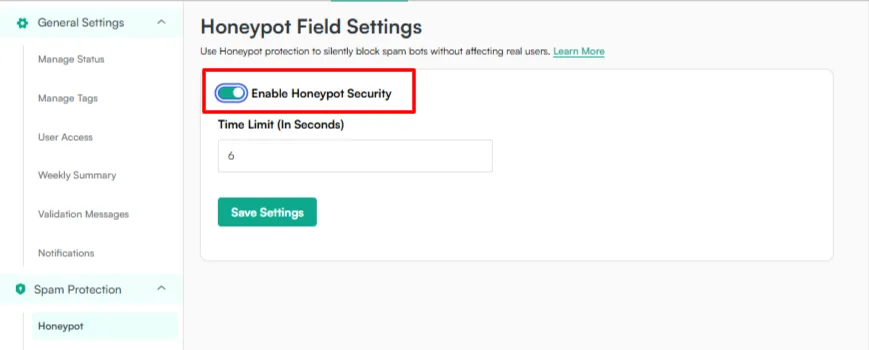
- Click on Save Settings.
You have successfully enabled Honeypot spam protection. For step-by-step guidance, follow our blog on: How to Stop Contact Form Spam in WordPress [8 Proven Ways].
How to View Uploaded Files in WordPress
After visitors submit files through your form, you’ll need a way to access them.
The exact process depends on how your form plugin handles submissions and file storage. With Gutena Forms Pro, you can review submitted form entries and access the associated submission information, including uploaded files where available.
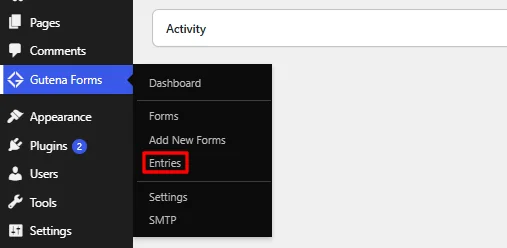
- Go to Gutena Forms → Entries.
- Click on the eye icon under the Action column to view each entry in detail.

- In the extensive view of each record, you will find each detail, along with the file that was uploaded.
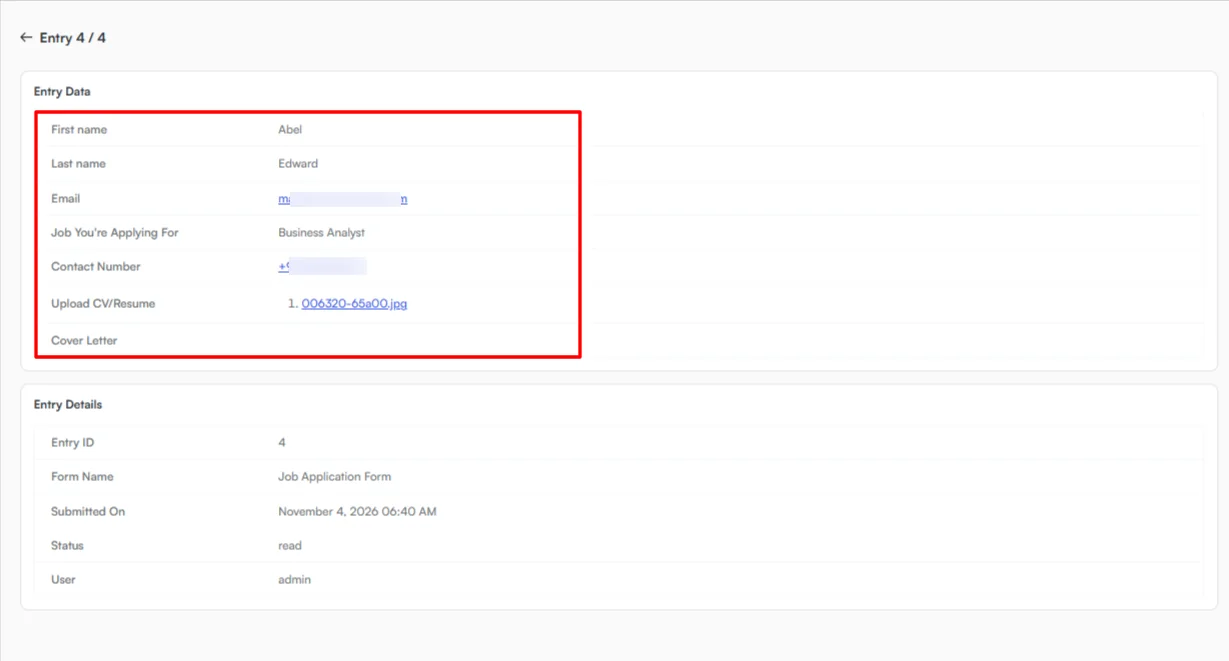
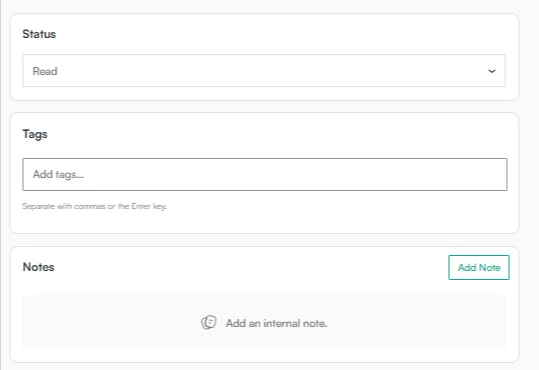
- You can also assign statuses and tags and add notes for reference.
If you handle personal or confidential documents, review your site’s file access and retention practices. Only give authorized users access to submitted files, and remove files when you no longer need them.
Test Your File Upload Form Before Going Live (Checklist)
Before publishing your WordPress file upload form for visitors, test the complete submission process. A field may appear correctly in the editor but still fail because of an upload restriction, notification setting, or server configuration.
Use this checklist to test the form:
- Upload an accepted file type.
- Test the maximum file size.
- Try uploading an unsupported file type.
- Submit the form with the required upload field empty.
- Test multiple file uploads.
- Confirm that email notifications arrive.
- Check that uploaded files appear with the form entry.
- Test the form on a mobile device.
These checks help you catch common problems before visitors start using the form.
Start Collecting Files With Gutena Forms Pro
A file upload field makes your WordPress forms more useful when visitors need to share documents, images, or other supporting files. Instead of asking them to send attachments separately, you can collect files alongside their form details.
With Gutena Forms Pro, you can create forms directly in the Gutenberg block editor and add file upload functionality without writing custom code. You can also configure form notifications and use spam protection options to manage incoming submissions.
Ready to create a WordPress file upload form? Get Gutena Forms Pro and start collecting files through your WordPress website.
Frequently Asked Questions
Can I Create a WordPress File Upload Form for Free?
It depends on the form plugin. Gutena Forms offers file upload functionality through its Pro version, so you’ll need Gutena Forms Pro to use this feature.
Can I Add a File Upload Field to My Existing Contact Form?
Yes. If your form plugin supports file uploads, you can add an upload field to an existing contact form and configure its settings.
Can Users Upload Multiple Files in One Form?
This depends on your plugin’s upload settings. Check whether it supports multiple files in one field or requires separate upload fields.
What File Types Should I Allow?
Allow only the formats your form needs. For example, use PDF and DOCX for documents or JPG and PNG for images. Avoid accepting unnecessary file types.
How Do I Increase the Maximum Upload File Size in WordPress?
Check your form’s upload limit and your server’s PHP upload settings. If the server limit is too low, ask your hosting provider to increase it.
Where Can I See the Files People Upload?
This depends on your plugin’s storage method. Gutena Forms Pro lets you review submissions through its entries or submissions area and access associated upload information.
Do I Need Shortcodes to Add a File Upload Form?
No. Gutena Forms uses the WordPress block editor, so you can add and publish your form directly through a Gutenberg block.