
Hiring often starts with a pile of emails, inconsistent CVs, and missing details. A job application form gives potential applicants a clear way to share the information an employer needs. It also gives employers a consistent place to review submissions.
You can create a WordPress job application form with Gutena Forms and add fields for contact details, work experience, and role-specific questions. With Gutena Forms Pro, you can also accept file uploads and store form entries in WordPress.
In this blog, you will learn how to create a WordPress job application form, set up notifications and spam protection, and test the application process before you publish it.
What is a WordPress Job Application Form?
A WordPress job application form is an online form that lets candidates apply for an open position on your website. It can collect contact information, employment history, qualifications, and other details that are relevant to the role.
Instead of asking every candidate to email the same information in different formats, you can use one form to request the details your hiring process needs. Applicants complete the fields and submit their information through your careers page or another page on your site.
A job application form can support the application process, but it isn’t a full applicant tracking system. It won’t replace a hiring workflow unless you connect it to tools that manage those tasks.
Why Add a Job Application Form to WordPress?
A dedicated application form gives candidates a consistent way to apply and helps your team collect comparable information.
1. Collect the Details You Need
Choose fields that relate directly to the position. For example, a role may require a portfolio, a particular certification, or a short response about relevant experience.
A structured form helps you request those details from each applicant without asking candidates to guess what to include in an email.
2. Make Applying More Straightforward
A clear form tells candidates what information to provide and how to submit it. Keep the instructions simple, mark required fields clearly, and avoid asking for information that doesn’t help you assess the application.
3. Keep Applications Together
Gutena Forms Pro stores form entries in WordPress, so your team can review submitted applications from the dashboard. This can make it easier to find submissions than searching through separate email threads.
Stored entries don’t provide a full recruitment pipeline or candidate-management system. If your team needs those features, use a dedicated hiring tool or an integration that supports them.
4. Receive Submission Notifications
You can configure email notifications so the hiring team receives an alert when someone submits the form. Include the information your team needs to identify the application and review it.
Notifications help your team know when a submission arrives, while stored entries provide a place to review the submitted information.
What is Included in the Ideal Job Application Form
The right fields depend on the role and your hiring process. Start with the information you need to assess an application, then add role-specific questions only when they serve a clear purpose.
| Field | Why include it |
| Full name | Identify the applicant |
| Email address | Contact the applicant about their application |
| Phone number | Provide another contact method, if needed |
| Position applied for | Identify the role, especially if the form covers multiple openings |
| Relevant experience | Ask for a brief summary of experience related to the role |
| CV or résumé upload | Let applicants submit their résumé as a file |
| Cover letter or supporting details | Give applicants space to explain their interest or qualifications |
| Portfolio or work samples | Request examples when the role requires them |
You may also need questions about availability, certifications, or other role-specific requirements. Keep the form focused: every additional field asks candidates to spend more time applying.
Decide Which Fields Are Required
Mark a field as required only when you need the answer to review the application. Contact details and a résumé may be necessary for many roles, while a portfolio or cover letter may not be relevant to every opening.
Tell applicants which fields they must complete. Before publishing, test the form with required fields left blank to confirm that it handles incomplete submissions as expected.
5 Easy Steps to Create a Job Application Form in WordPress
Gutena Forms lets you build a form in the WordPress editor. You can add the fields you need, configure submission notifications, and publish the form on a careers page.
Note: File uploads and stored entries are Gutena Forms Pro features.
Install and Activate Gutena Forms Pro
First, install and activate the free Gutena Forms plugin. Gutena Forms Pro requires the free plugin to work.
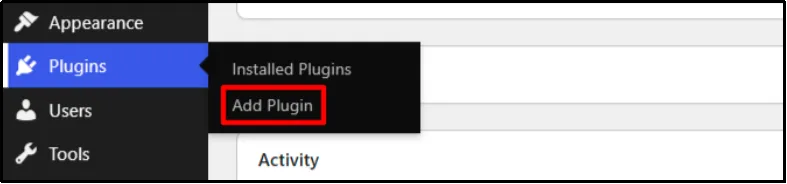
- Log in to your WordPress admin dashboard, go to Plugins → Add Plugin.
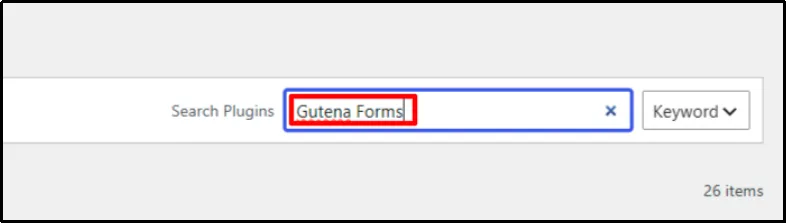
- Enter Gutena Forms in the search bar.
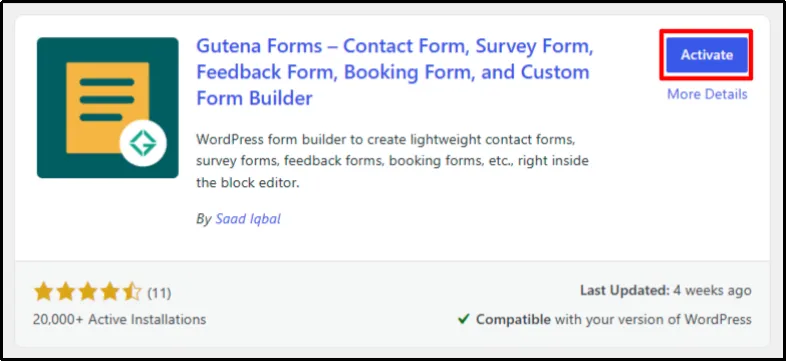
- Click Install Now, then click Activate after installation.
- Head to the Gutena Forms pricing page. Purchase any plan of your choice.
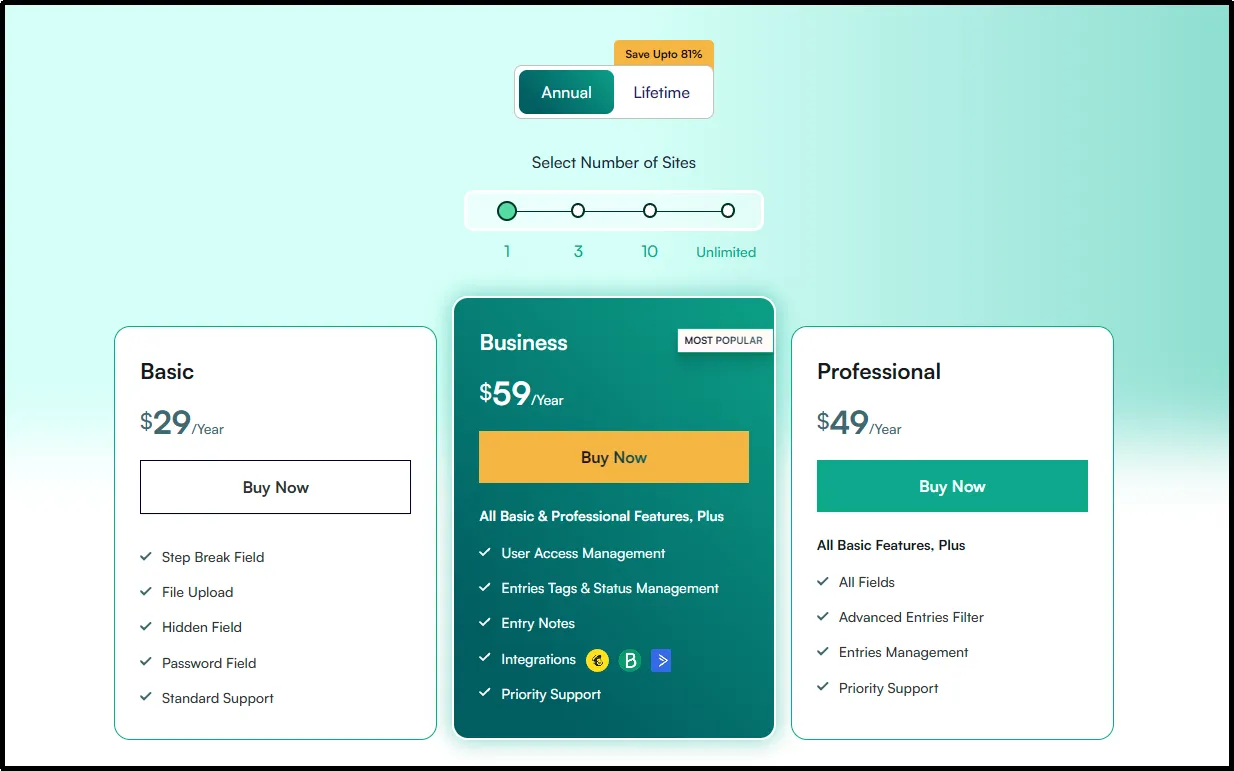
- You’ll receive an email with the Gutena Forms Pro ZIP file and license key. Download the ZIP file and copy the license key.
- Now go back to Plugins → Add Plugin → Upload Plugin.
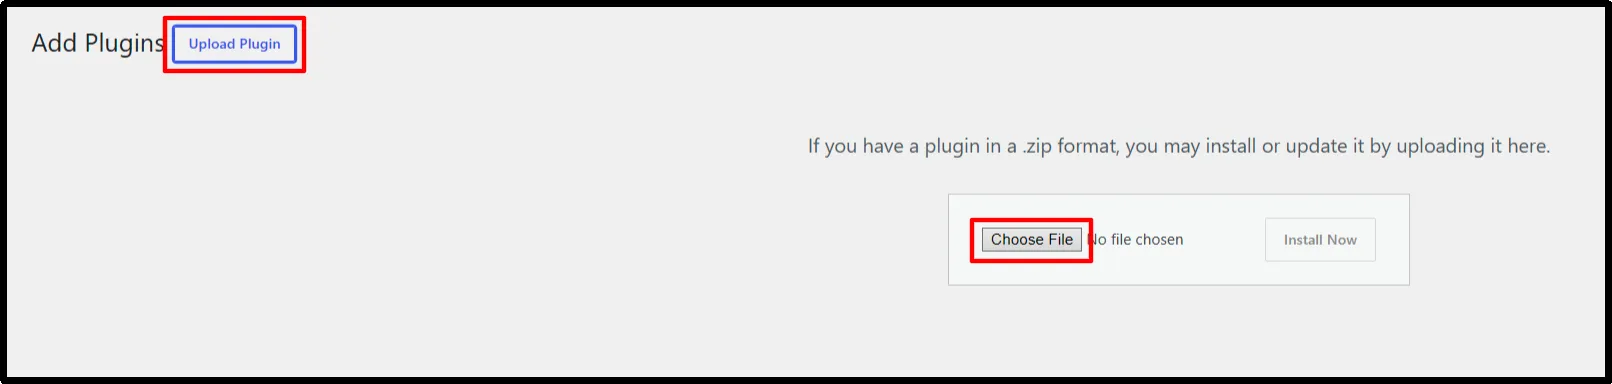
- Click on Choose File and select the Gutena Forms Pro ZIP file.
- Click Install Now.
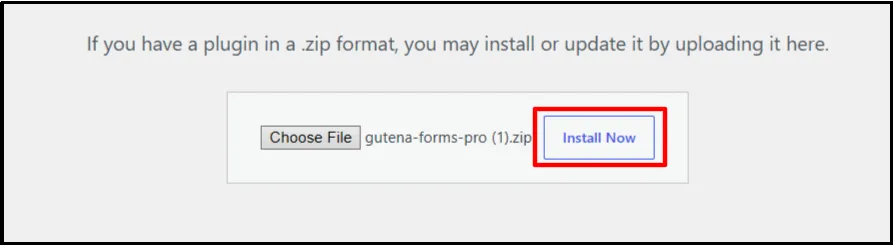
- Click on Activate Plugin. You will be redirected to the All Plugins page.
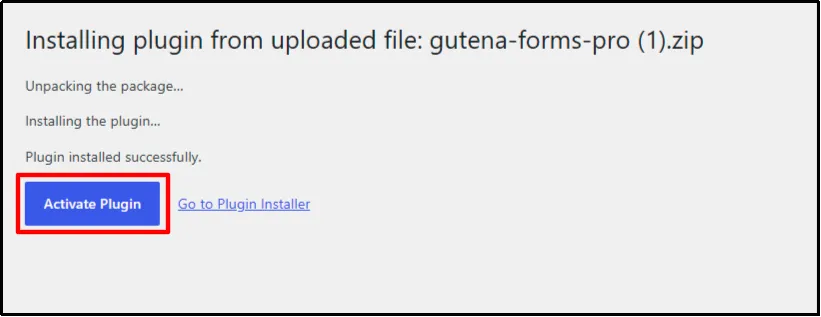
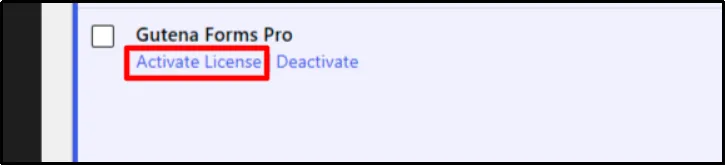
- Scroll down and click on Activate License.
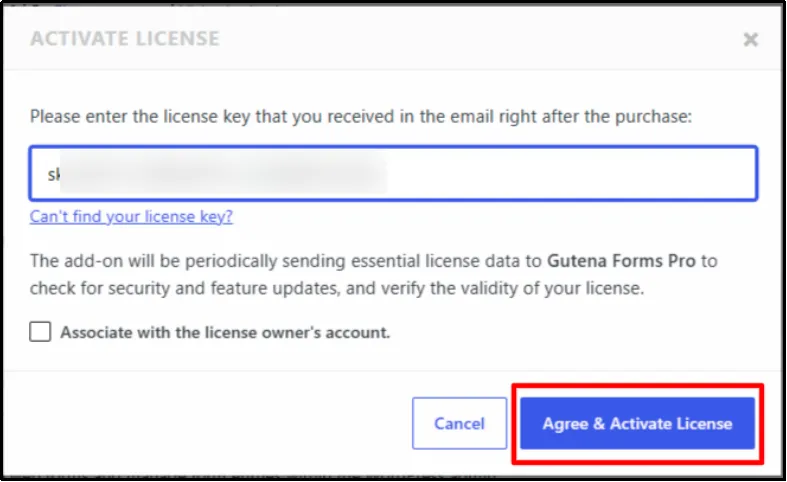
- Paste the license key and click on Agree & Activate License.
Congratulations! You have successfully installed Gutena Forms Pro!
Step 1: Create a Form
You can create and publish a form using Gutena Forms in two ways:
- Create a form directly on a page: Create a new page, add the Gutena Form block, build your form, and publish the page.
- Create a form separately and add it to a page: Go to Gutena Forms → Add New Form, create and publish your form, then create a new page, insert the existing form, and publish the page.
For the job application form, we’ll create a form separately in Gutena Forms and then embed it on a careers page.
- Go to Gutena Forms → Add New Form.
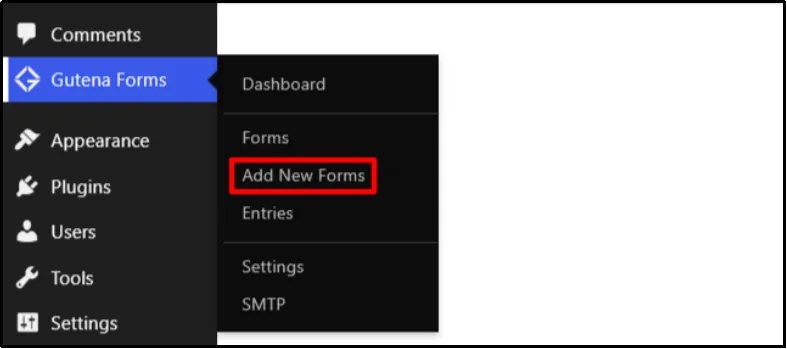
- Enter a Form title, for instance, any “job title” application form. Select any form variation; we will select the two-column modern.
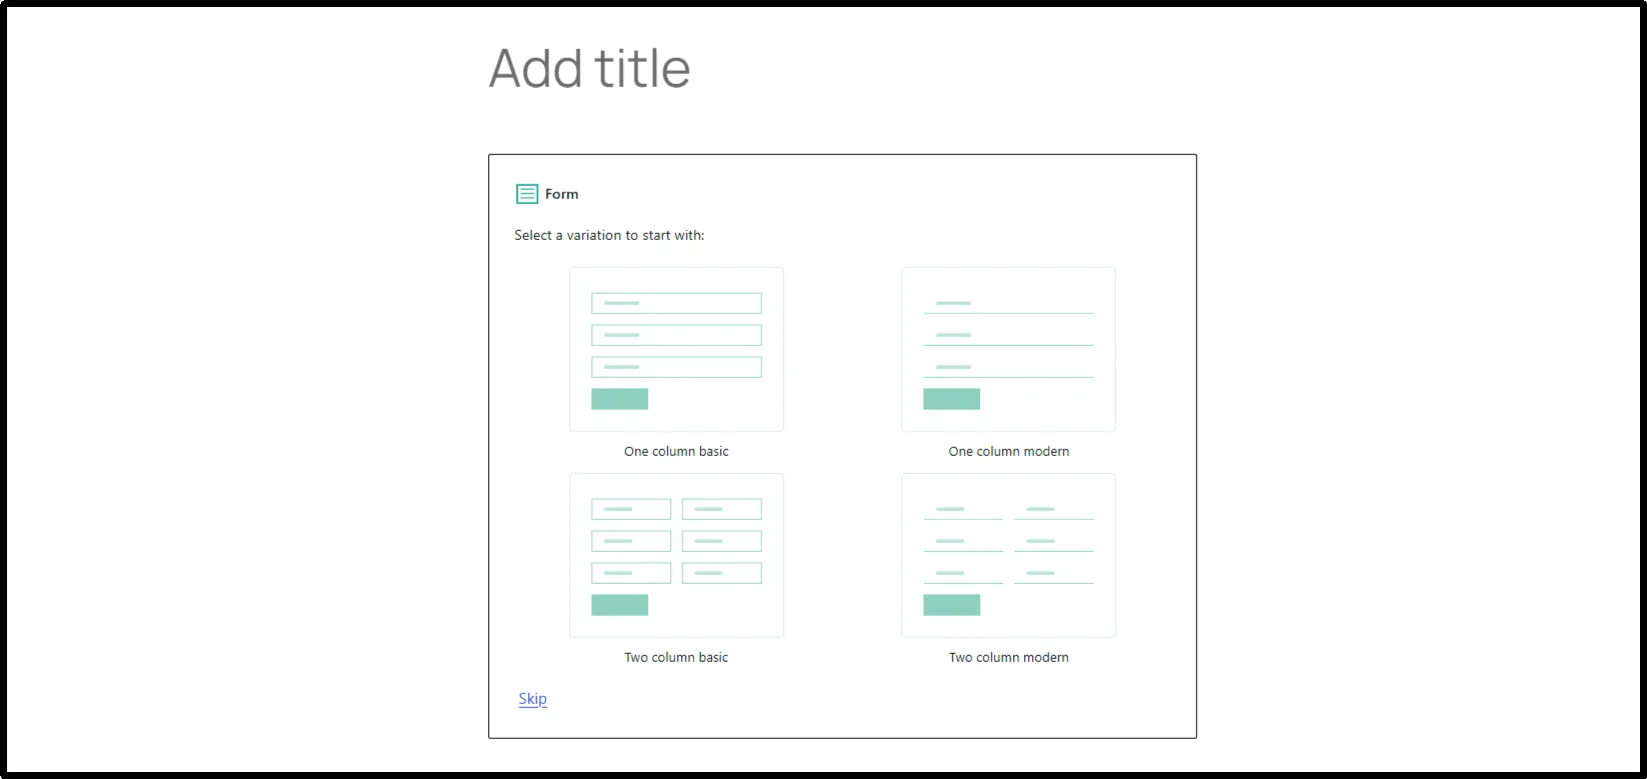
This is what the two-column modern variation looks like.
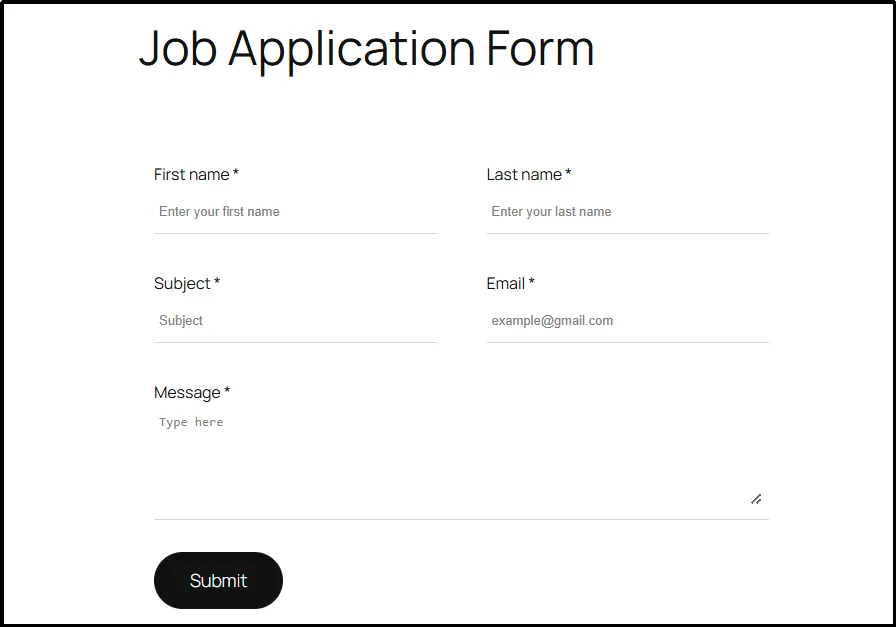
Now we have to add the important fields and remove the unnecessary ones.
Step 2: Add Applicant Information Fields
Add fields for the details you want to collect. A basic application form may include:
- Full name
- Email address
- Phone number, if needed
- Position applied for
- Relevant experience
- A field for additional information
Use a longer text field when candidates need to describe their experience or answer a role-specific question. For example, you could ask applicants to summarize experience that relates to the position.
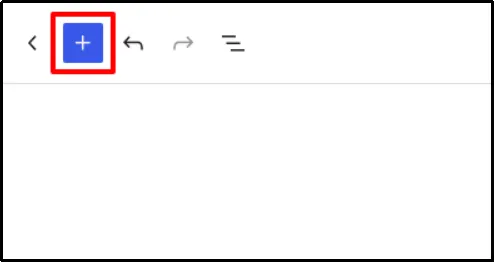
- Click on the top-left + button.
- Insert your desired job application form fields. For instance, we’ve added a dropdown for selecting job positions, a phone field, and a file upload field for CVs.
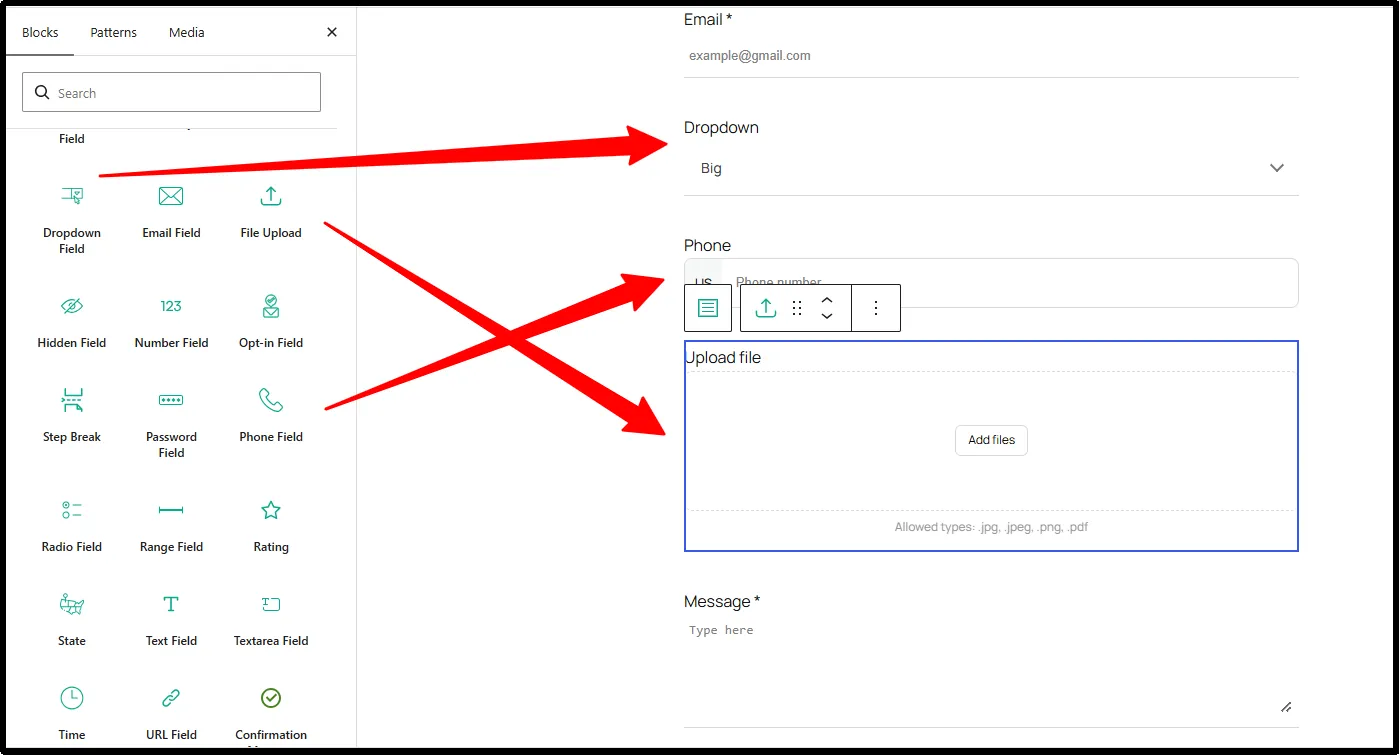
Now double-check whether you need any additional fields based on your requirements.
Step 3: Configure Required Fields and Form Instructions
Review each field and decide whether applicants must complete it before submitting the form.
Use clear labels. “Email address” is easier to understand than “Contact,” while “Relevant experience” tells applicants what to write in a longer response field.
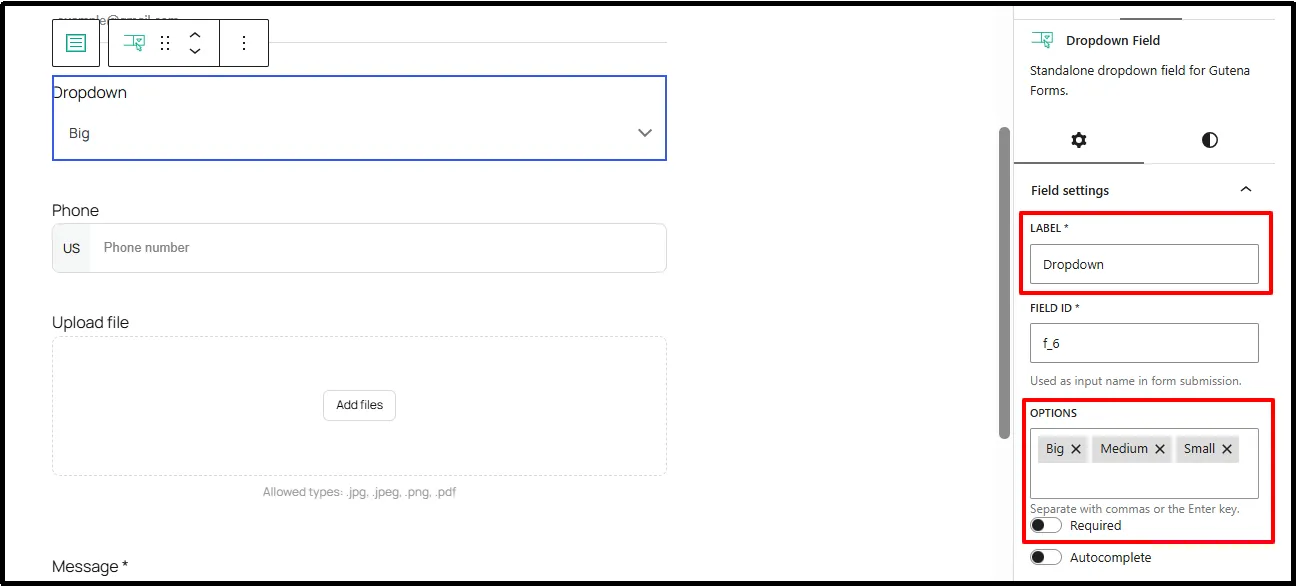
- Start with the dropdown, then click it. Correct the label to something related to selecting the job you are applying for. Add correct dropdown options and enable the required status.
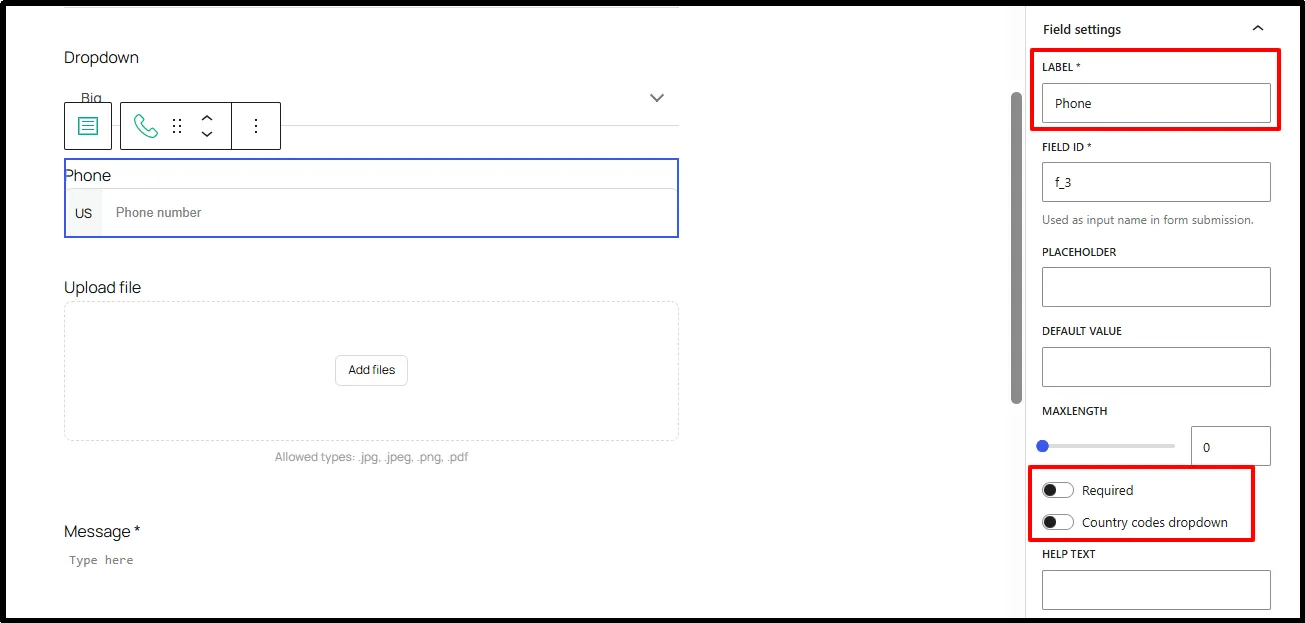
- For the phone field, change the label to “Phone Number” or “Contact Number. You can also set a max length, but make the contact number field required and allow the country code dropdown unless you want to hire only in the US.
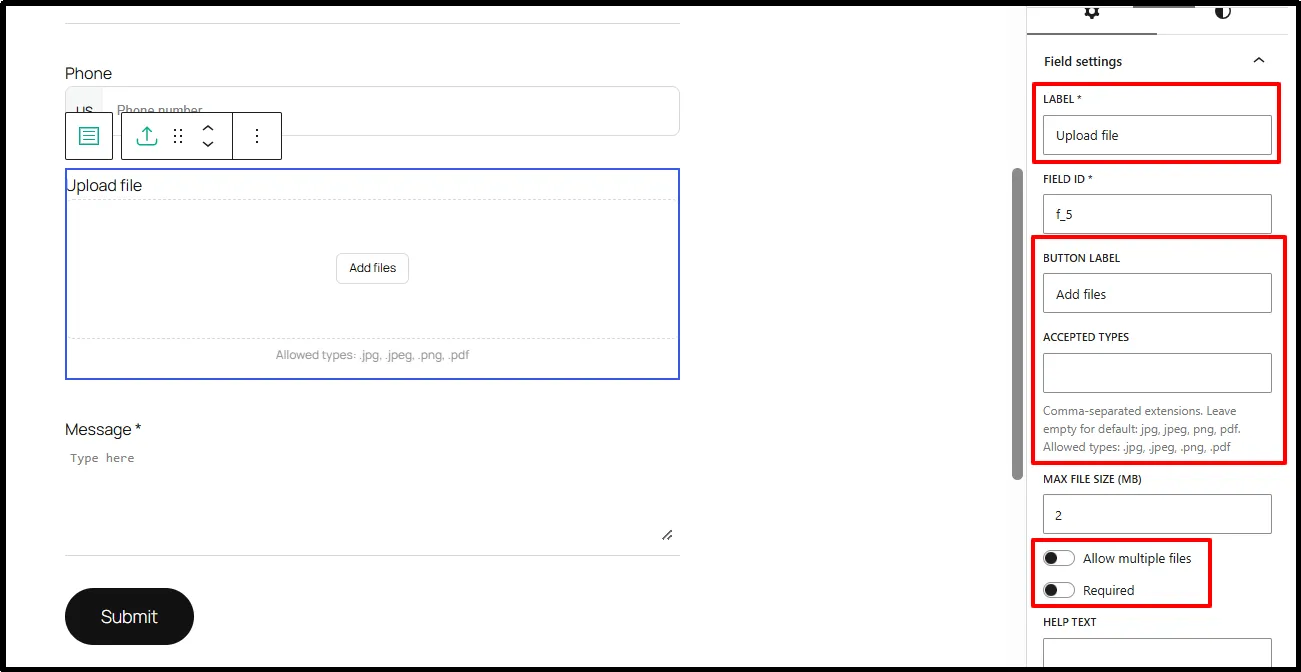
- Begin the File Upload field changes by correcting the label to something like Upload CV/Resume. You can also change the button label. Specify accepted file types (e.g., .pdf, .jpg) and set the maximum file size. Enable multiple file uploads if applicants need to submit additional documents, such as cover letters or portfolios. Make this field required only if every applicant must submit a CV.
- Now click on Publish.
Note: If you have a lengthy job application form where you assess the skills of the applicant, you can also create a Multi Step Form.
- Add the multiple-choice questions by inserting the Radio field and configuring it accordingly.
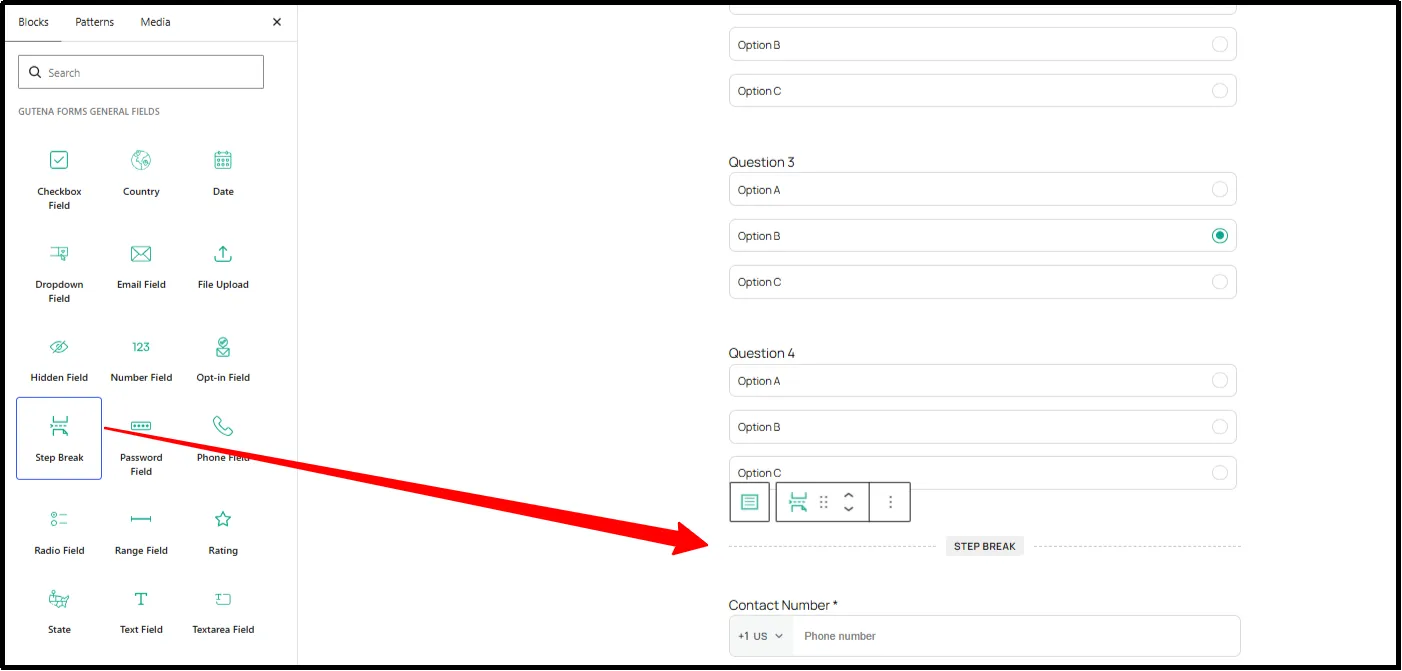
- Decide where you want to break the form into a multistep.
- Insert the Step Break field at your desired place.
- Publish or save changes.
If you need step-by-step guidance, you should follow our How to Create a Multistep Form blog.
Step 4: Add Form Notifications and Spam Protection (Optional)
Configure admin email notifications to alert your hiring team when someone submits an application. You can also enable Gutena Forms’ global Auto Responder to send automatic confirmation emails to form submitters.
- Enable form notifications: Set up an email notification to send each application to the hiring team’s email address. You can also enable an autoresponder to confirm that the applicant’s submission was successful.
- Enable spam protection: Choose a suitable method, such as honeypot protection, Google reCAPTCHA, or Cloudflare Turnstile, to prevent unwanted submissions.
This step is optional, but we highly recommend enabling it to improve application management and reduce spam.
How to enable admin form notifications:
- Go to the Gutena Forms → Forms.
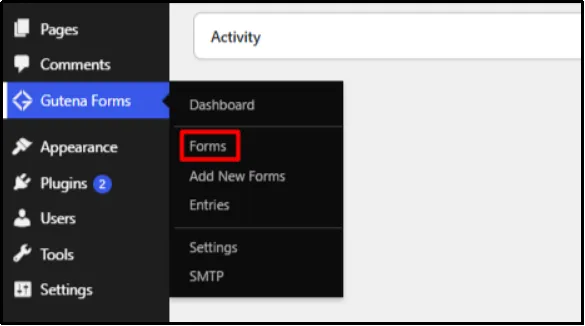
- Select the one whose admin form notifications you want to configure.
- Select the form, and on the right, you will find the individual form settings.
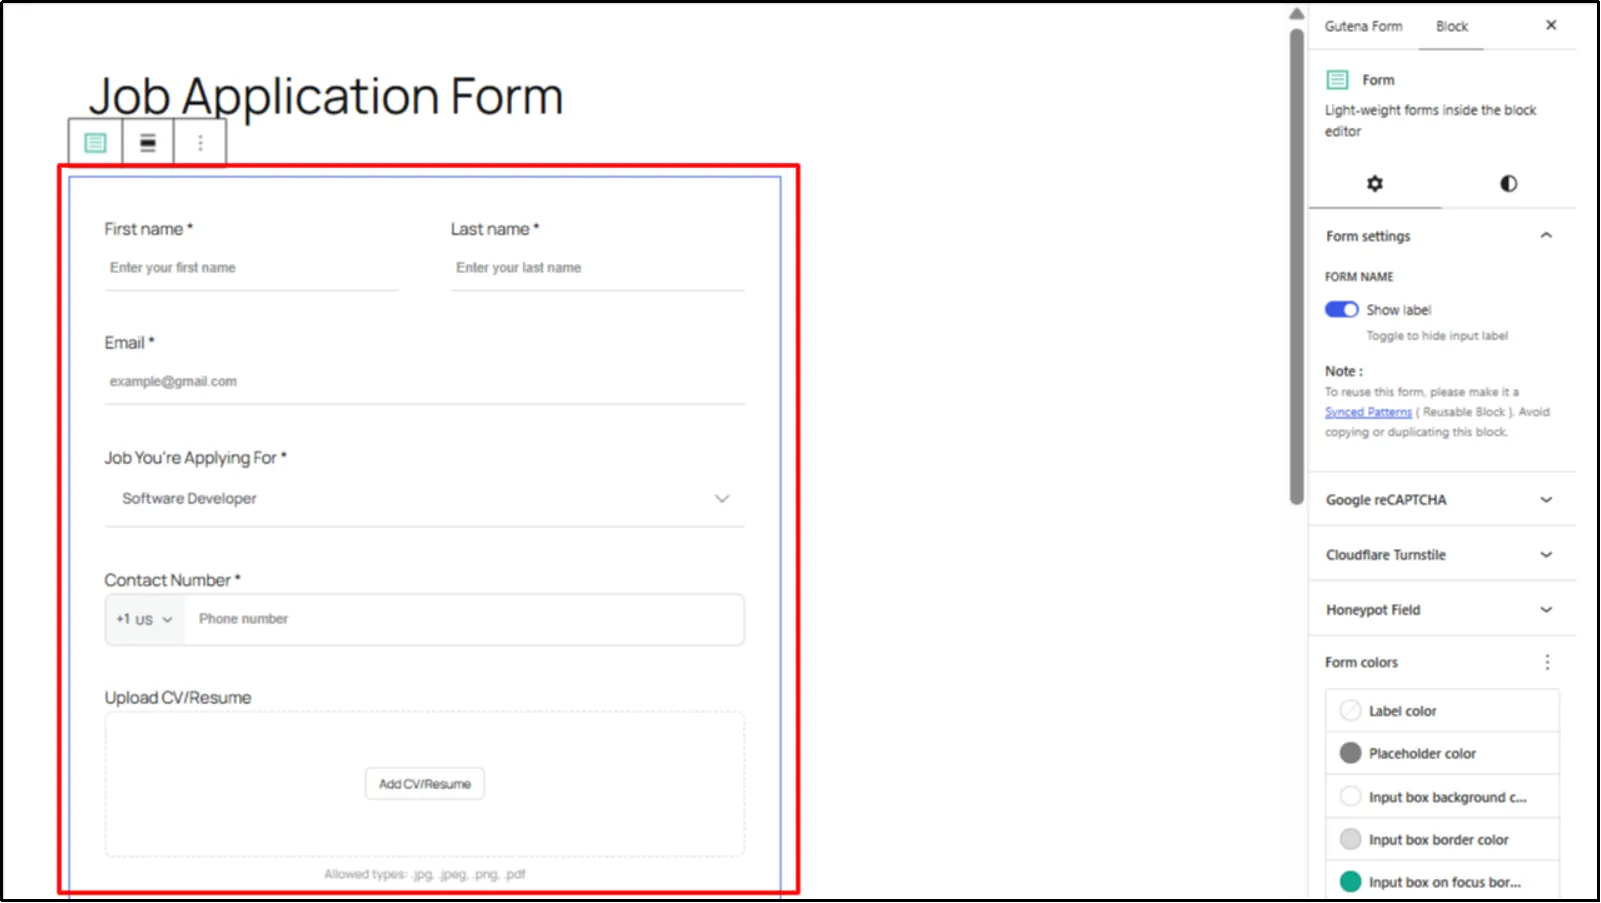
- Toggle the Admin Notification button to ON.
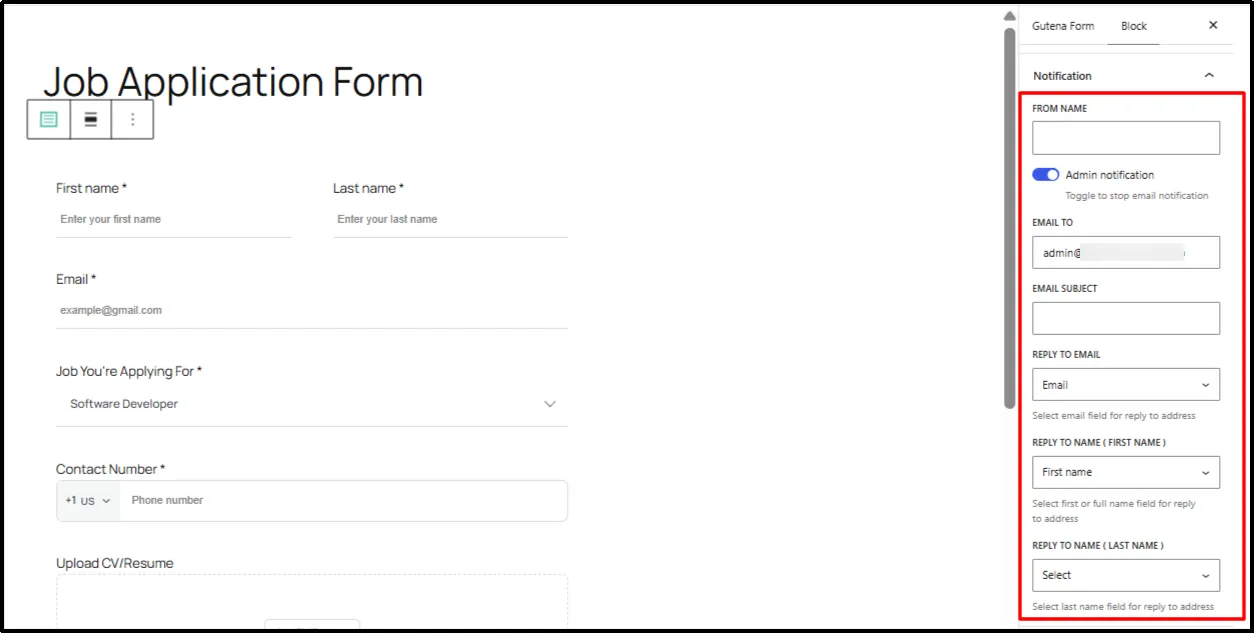
- Now configure the admin email notification settings.
- Enter the hiring team’s email address as the notification recipient. Add a clear subject line and map the appropriate form fields to the Reply-To address, first name, and last name.
- Publish the form to apply the changes.
How to enable user form notifications:
- Go to Gutena Forms → Settings.
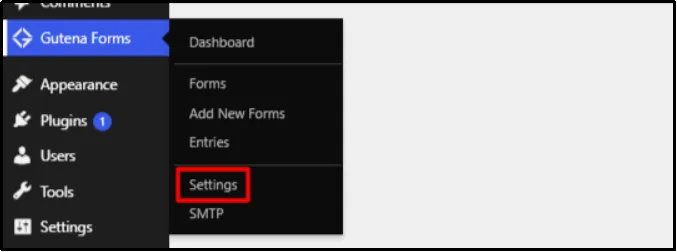
- Under General Settings, visit Notifications.
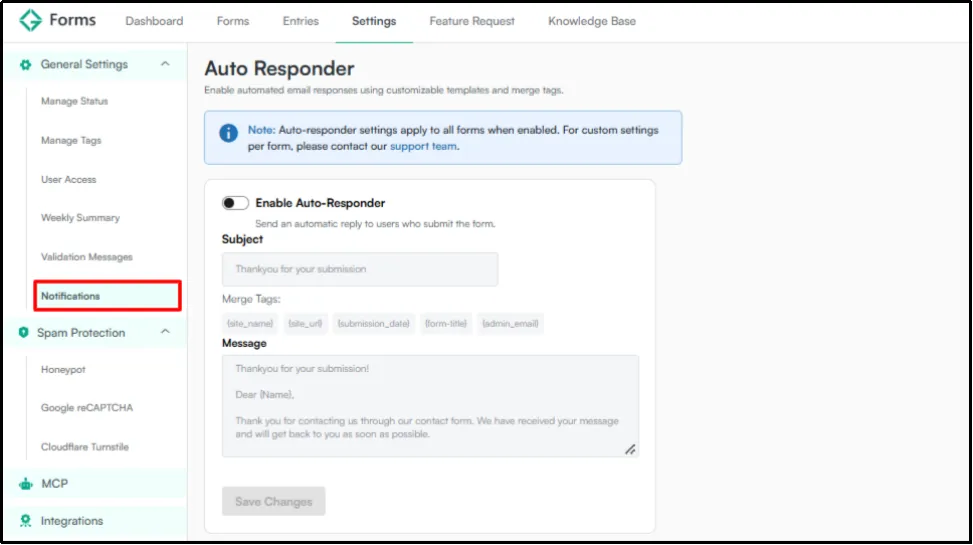
NOTE: Gutena Form’s Auto Responder is a global setting to send automatic replies to users.
- Click on Enable Auto-Responder.
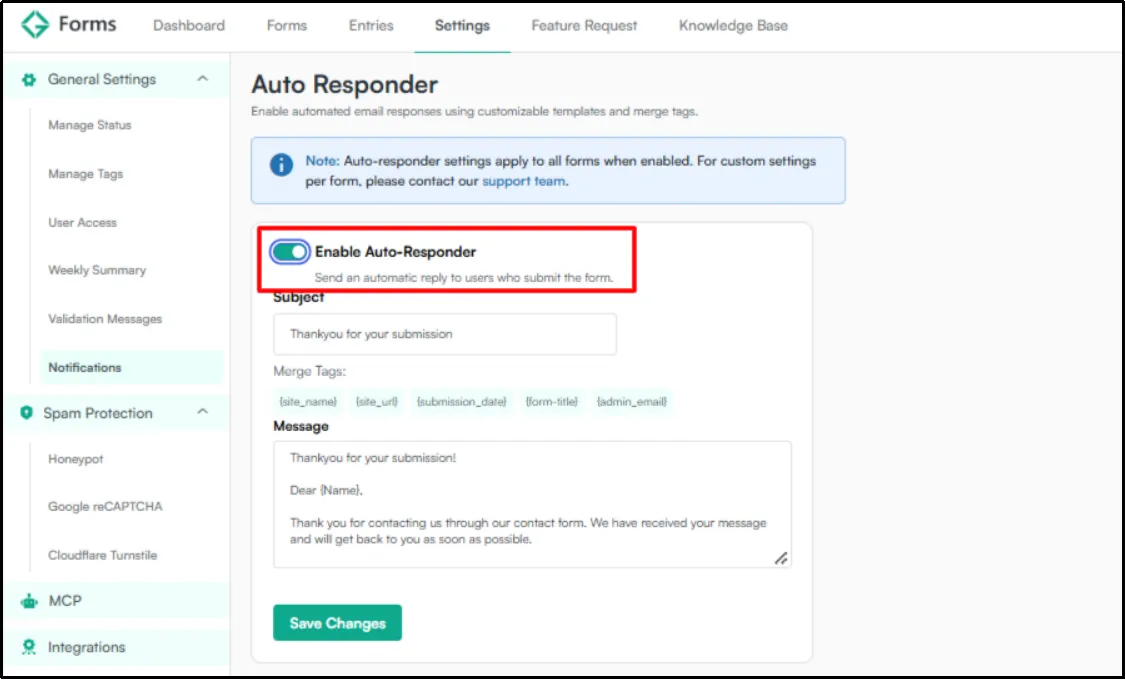
- Configure the email subject and message. You can also use the tags for reference.
- Click on Save Changes.
This is usually used for thanking the audience for form submissions.
How to enable spam protection:
- Head to Gutena Forms → Settings.
- Select any one of the currently available spam protection methods.
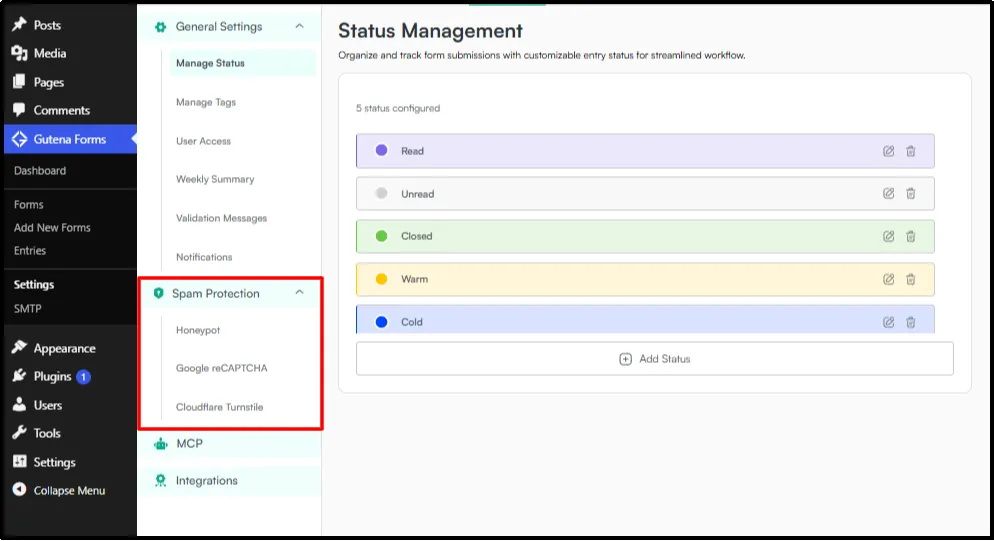
- For this guide, we’ll use Honeypot. Select it and enable Honeypot Security. For instructions on configuring other spam protection methods, refer to the relevant documentation below.
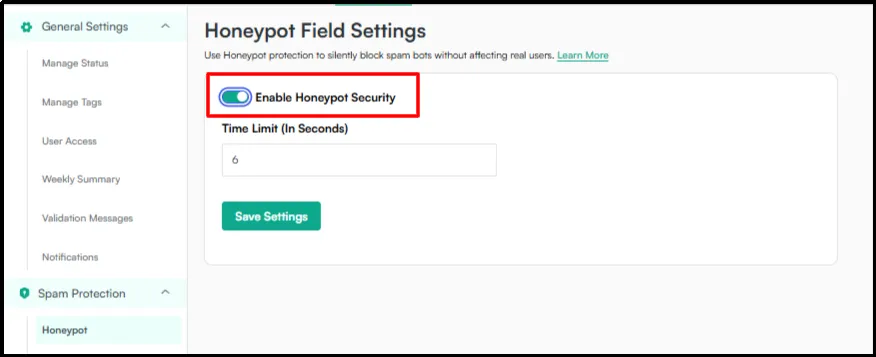
- Click on Save Settings.
You have successfully enabled Honeypot spam protection. Check our spam protection documentation for a detailed step-by-step guide for each spam protection method.
Step 5: Publish the Form on Your Careers Page
When the form is ready, add a careers page or add the form to any existing page.
- Go to Pages → Add Page.
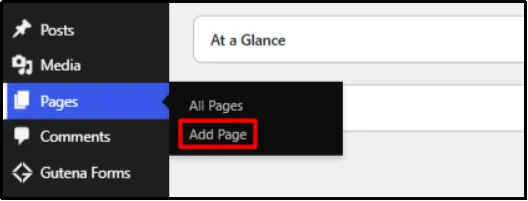
- Enter a page title, i.e., Careers, and add any information if you’d like.
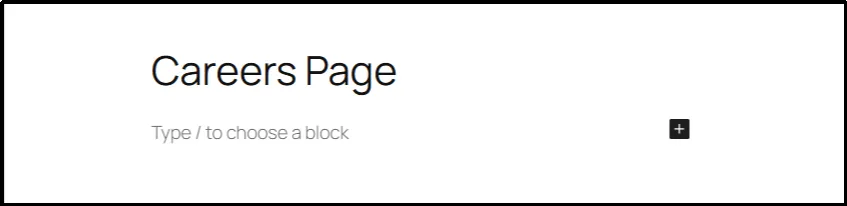
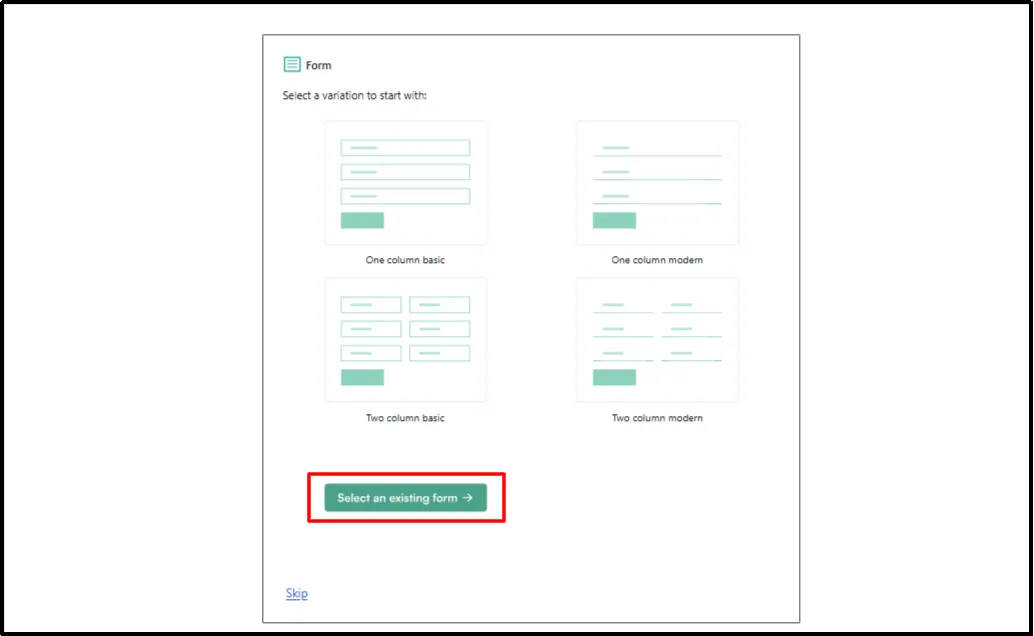
- Now enter /Gutena Forms in the block editor, then select Gutena Forms.

- Click Select an existing form.
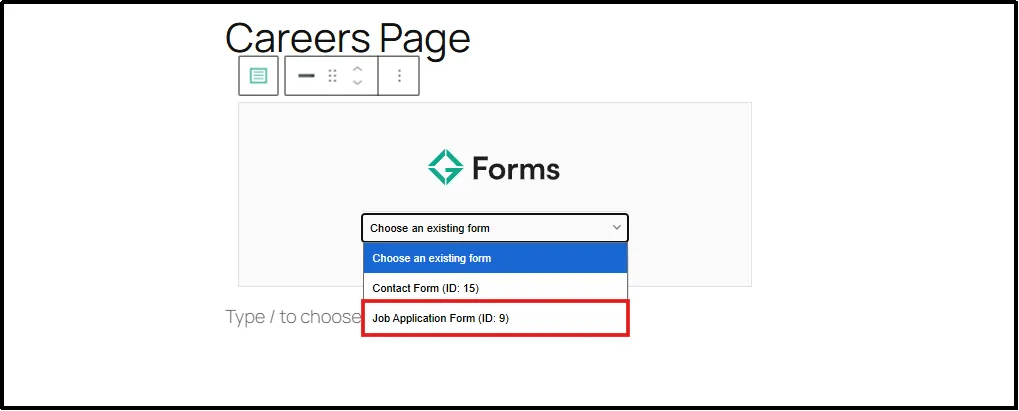
- Select the published form from the drop-down.
- Publish the page, and you are good to go.
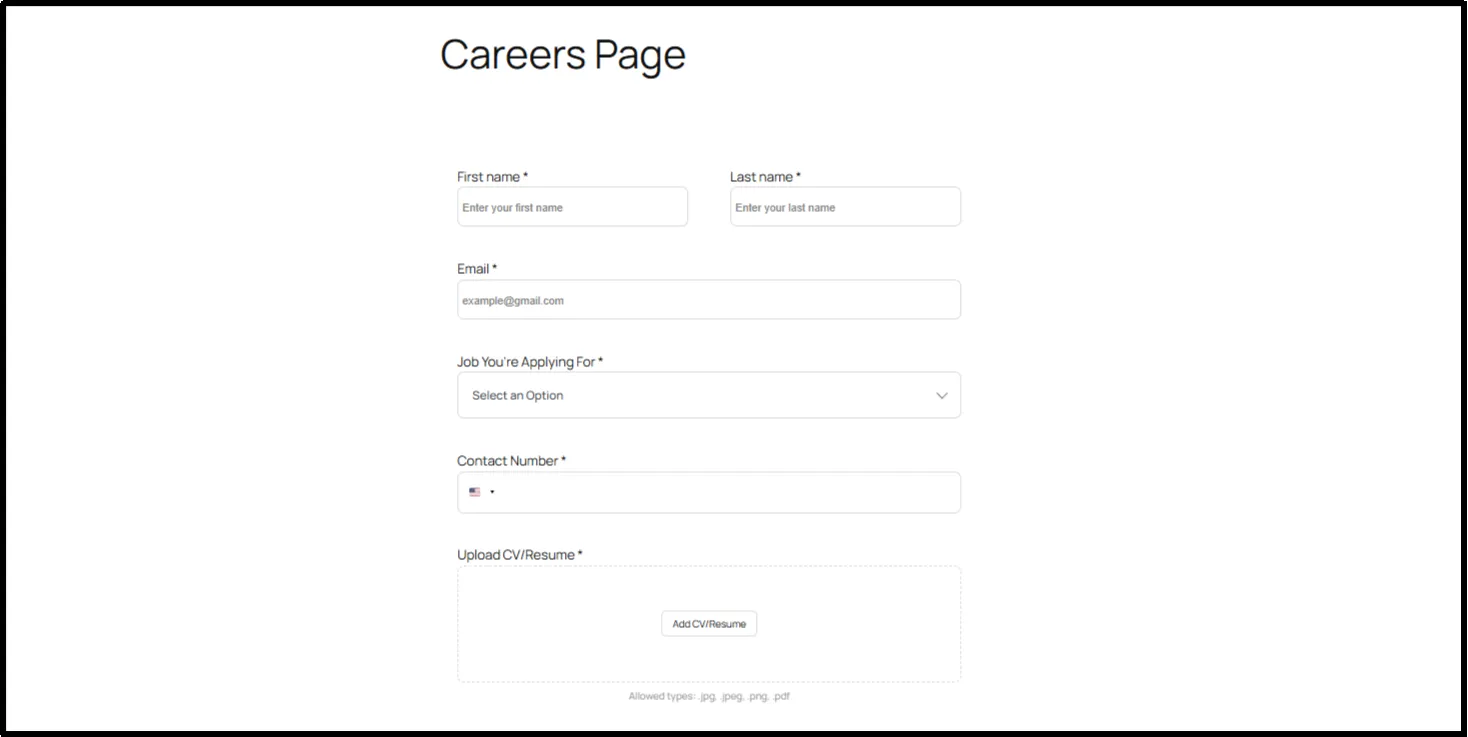
Before publishing, check the page on desktop and mobile. Make sure the form’s instructions, fields, and submit button are easy to find.
How to Review Job Applications in WordPress
Gutena Forms Pro stores form entries in WordPress. After candidates submit applications, your team can review the stored submissions from the dashboard.
- Go to Gutena Forms → Entries.
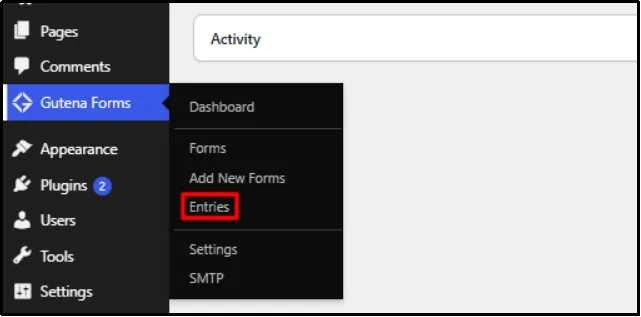
Use a consistent review process. For example, decide who will check new applications, how your team will assess the information, and where you’ll record next steps. Gutena Forms collects the form submissions; it doesn’t replace a dedicated recruitment system or automatically manage candidate stages.
- Click on the eye icon under the Action column to view each entry in detail.
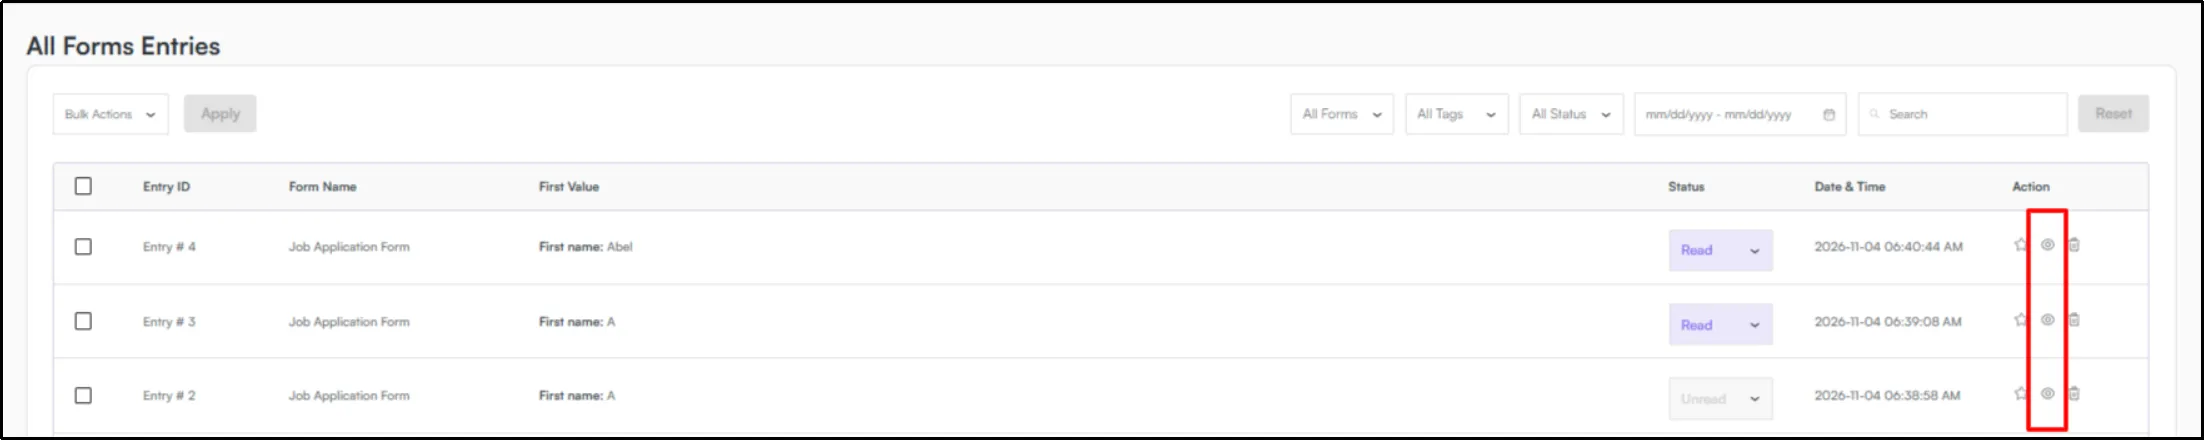
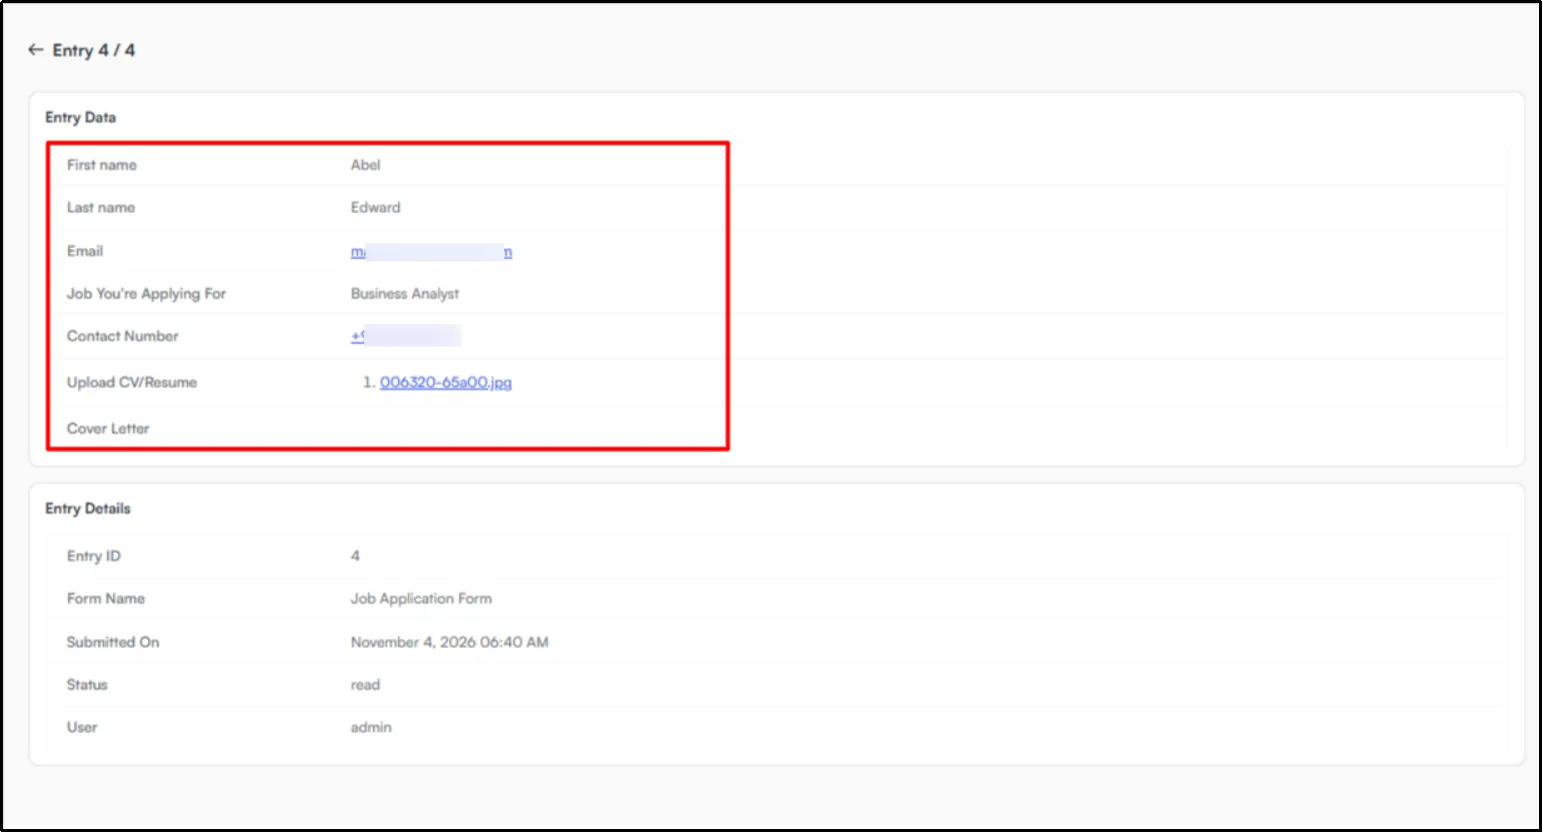
- In the extensive view of each record, you will find each detail, along with the file which was uploaded.
- You can also assign statuses and tags and add notes for reference.
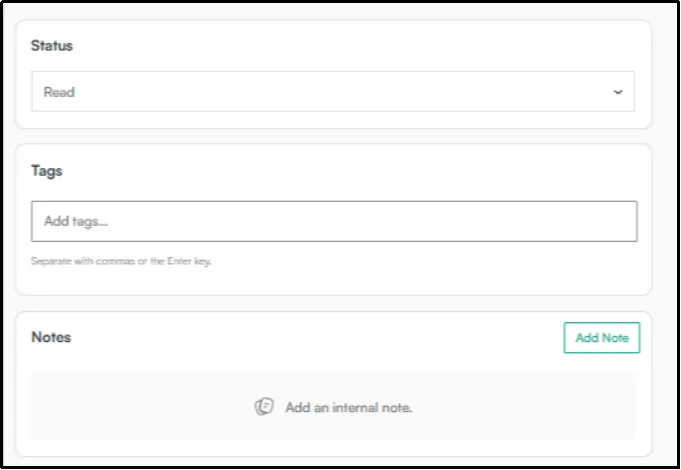
If your hiring process requires assigning applicants, tracking interviews, or managing hiring decisions, use a tool designed for those tasks or connect your form to a service that supports them.
Best Practices for a Better Job Application Form
A well-designed job application form makes it easier for candidates to apply and helps you collect the information you need. Keep the form clear, focused, and easy to complete. Here are some best practices to keep in mind when creating your form:
1. Keep the Form Relevant to the Role
Ask only for information your team needs to review an application. A long form with unrelated questions can discourage candidates from completing it.
2. Explain What Applicants Should Submit
Tell candidates what to include in each field. For file uploads, state the accepted file types or size limits if your form has them.
3. Make the Form Easy to Use on Mobile
Test the form on a phone-sized screen. Check that labels are readable, fields fit the screen, and buttons are easy to tap.
4. Protect Applicant Information
Collect only the information you need and restrict access to application entries and uploaded CVs to authorized team members. Explain how your organization collects, uses, stores, and retains applicant information. Establish a retention policy to determine when your team should delete applications.
5. Test Notifications and Submissions
Submit a test application using an email address you can access. Confirm that the form accepts the information, the notification reaches the intended recipient, and the entry appears in the dashboard if you use stored entries.
Troubleshooting Common Job Application Form Problems
Sometimes, applicants may have trouble submitting a form, uploading a CV, or receiving confirmation emails. You can often resolve these issues by checking the form and its settings. Here are some common problems and how to troubleshoot them:
Problem 01: Applicants Can’t Upload Their CV
Check that you’re using Gutena Forms Pro and that the file upload field is configured. Review the file requirements shown to applicants and confirm that the test file meets them.
If the problem continues, check the current plugin documentation and your site’s upload restrictions.
Problem 02: The Hiring Team Doesn’t Receive an Email
Review the notification recipient, subject, reply-to address, and selected form fields. Then submit another test application.
If the notification still doesn’t arrive, check your site’s email delivery setup. A form can trigger a notification, but successful delivery also depends on the website’s email configuration and the recipient’s mail system.
Problem 03: The Form Accepts Incomplete Applications
Check which fields you’ve marked as required. Test the form by leaving a required field empty and attempting to submit it.
If the form behaves differently than you expect, review the field settings and current validation behavior.
Problem 04: Spam Submissions Continue
Confirm that your chosen spam protection method is configured correctly. Test the form with a legitimate submission as well, so you can check that the protection doesn’t block genuine applicants.
Create a WordPress Job Application Form With Gutena Forms
A clear application form helps candidates provide the information your team needs without guessing what to send. With Gutena Forms, you can build the form in WordPress, configure an email autoresponder, and use Pro features such as file uploads and stored entries to support your application process.
Plan the fields around the role, explain what applicants should submit, and test the complete form before publishing it on your careers page.
Ready to build a WordPress job application form? Get Gutena Forms and follow this guide to get a fully functional WordPress job application form.
Frequently Asked Questions
Can I create a job application form in WordPress for free?
You can create a form with Gutena Forms, but the file upload and stored-entry features described require Gutena Forms Pro.
Can I receive an email when someone applies?
Yes. You can configure email notifications for form submissions. Set the intended recipient and review the message details before publishing the application form.
Where can I review submitted applications?
Gutena Forms Pro stores form entries in WordPress, where your team can review submissions from the dashboard.
Can I use one form for multiple job openings?
Yes. Add a field that lets applicants identify the position, or create separate forms for each vacancy. Choose the setup that makes it easiest for your team to identify and review applications.
How does Gutena Forms manage candidates?
Gutena Forms collects and stores form submissions. Once you receive the applications, you can begin recruitment stages, schedule interviews, or make hiring decisions.